Fishing Within 25km of Swansea Heads – Newcastle Wrecks and Wide Grounds
Fishing Out of Swansea Heads: Marks 19 to 22
This part goes north. Everything so far has worked the coast between Redhead and Norah Head, but the run up past Merewether toward the Hunter River mouth opens up a different kind of fishing — a tight reef complex off Merewether, two genuinely wide grounds out on the shelf, and the best wreck on this coast.
Positions come from the Marine Rescue Lake Macquarie fishing matrix, cross-checked against Navionics, which is also the source for depths and seabed detail. Distances have been recalculated from the coordinates. Where Navionics shows nothing at a position, the entry says so.
Before you read the numbers
The spread here is extreme. The Yarra Yarra is the furthest mark in this article by steaming distance and sits 700 metres off the beach. Pro Grounds is closer to the Heads and sits 18 kilometres out to sea. These are completely different days on the water, and the distance-from-Heads column tells you almost nothing about which is which. Read both figures.
One mark here is unverified. Faulkins doesn’t chart on Navionics. It’s included because it’s on the list and locals fish it, but the depth figures circulating for it are too vague to publish. Treated accordingly below.
Quick reference
| # | Mark | Position | From Heads | Offshore | Depth | Bottom | Main species |
|---|---|---|---|---|---|---|---|
| 19 | Merewether reef complex | 32° 56.6’–57.2′ / 151° 49.2’–50.1′ | 21.8–23.1 km | 3.3–4.3 km | 20–50 m | Reef, gravel, gutters | Snapper, kings, salmon |
| 20 | Pro Grounds | 33° 15.71′ / 151° 48.56′ | 23.3 km | 18.2 km | 30–50 m | Deep reef | Snapper, morwong, kings |
| 21 | Faulkins | 33° 17.22′ / 151° 46.44′ | 24.0 km | 16.7 km | unverified* | unverified* | Deep reef species |
| 22 | Yarra Yarra wreck | 32° 54.29′ / 151° 48.03′ | 24.6 km | 0.7 km | 15–25 m | Iron wreck on sand | Mulloway, yakkas, snapper |
* Nothing charts at this position. See the entry.
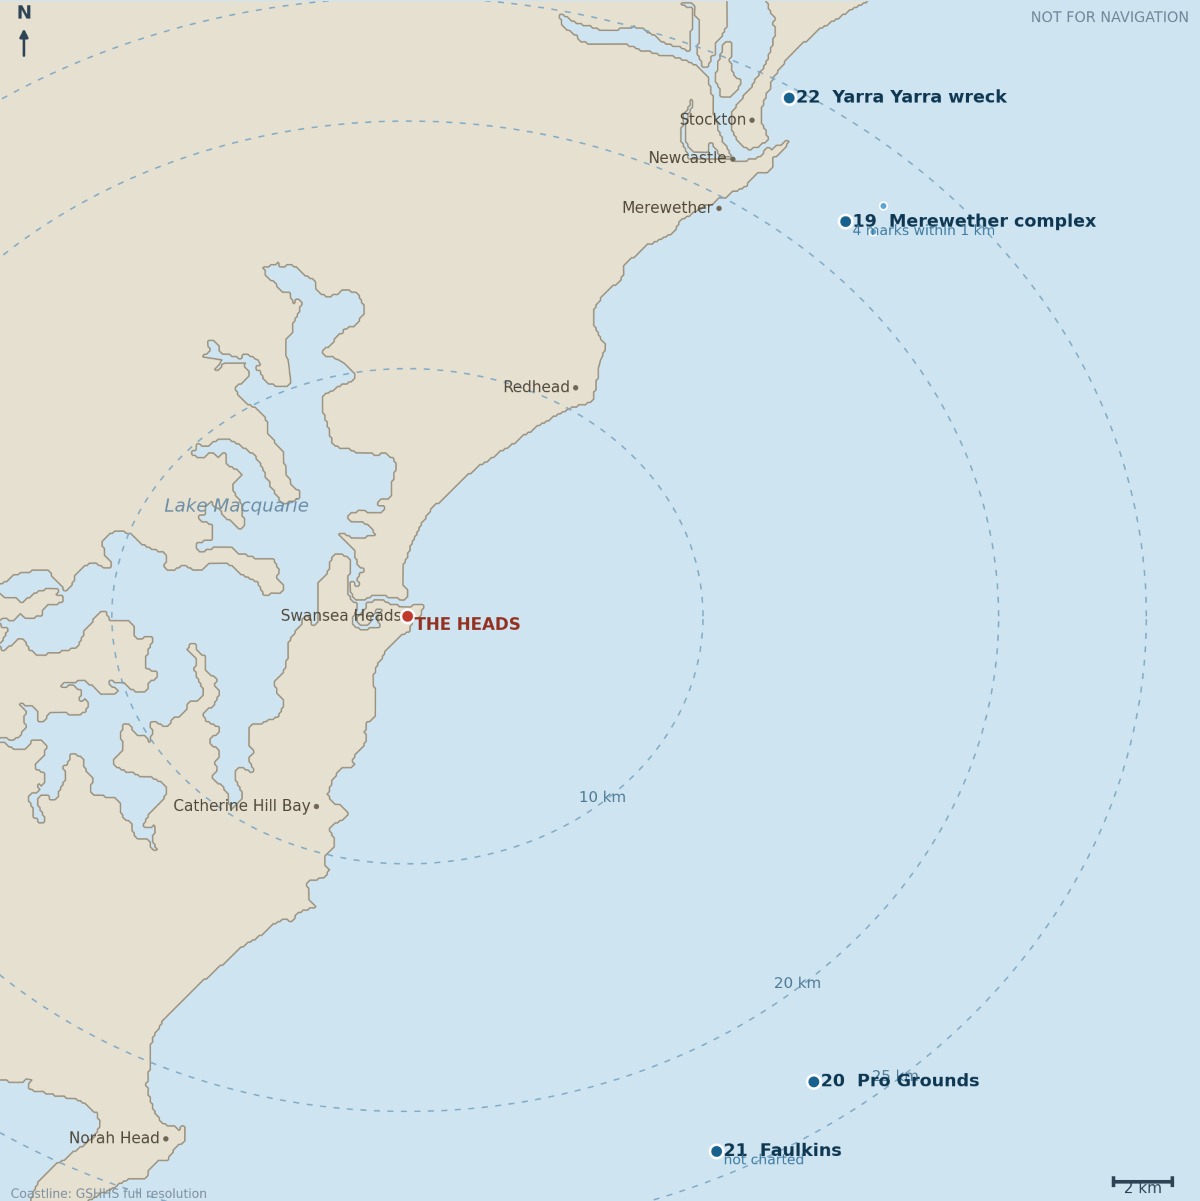
The marks on a map
Rings are 10, 20 and 25 km from the Heads. Note how far apart the two halves of this article sit: the Merewether complex and the Yarra Yarra are up near Newcastle, while Pro Grounds and Faulkins are well south and well out.
19. The Merewether reef complex — 21.8 to 23.1 km
Dumping Ground 32° 56.99′ S, 151° 49.25′ E
Simmies Reef 32° 57.196′ S, 151° 49.846′ E
The Rocks 32° 56.643′ S, 151° 50.071′ E
21.8–23.1 km from the Heads · 3.3–4.3 km offshore · 20–50 m charted
Three named marks inside a kilometre and a half of each other — Dumping Ground to Simmies is almost exactly a kilometre, Simmies to The Rocks a little more. There are four distinct marks charted within that same kilometre. This is one reef system off Merewether with several sets of numbers on it, and it’s best fished as a session rather than as separate stops.
Unlike the near-identical pairs elsewhere in this series, these are genuinely separate marks on the chart. The system shallows as you move north-east: The Rocks is the shallow end at 20–30 m, Simmies and the Dumping Ground run 30–50 m. That gradient is the thing to fish. The transitions between hard reef and sandy gutters are where the fish sit, not the middle of either.
The shallow end — The Rocks. At 20–30 m this is inner-reef ground that interacts heavily with the coastal wash and the current lines pushing around the Newcastle headlands. Snapper and silver trevally hold tight where the harder gravel and rock transitions into sand. Kingfish, bonito and tailor patrol the mid-water column, best at sunrise and sunset. Large Australian salmon run through in numbers through the cooler months, feeding hard in the broken water.
The deeper end — Simmies and the Dumping Ground. At 30–50 m the character shifts to structured reef bottom holding snapper, morwong, perch, squire and bream. Kingfish patrol these mid-depth reefs whenever current or bait activity picks up. Mulloway hold near the structured ground and drop-offs.
Baits and rigs: The shallow end rewards finesse — pitch unweighted or lightly weighted pilchards and squid strips into the current and let them sink naturally. It catches snapper without instantly snagging rock. Five-inch jerk shads or paddle-tails on a quarter to half-ounce jig head work the bottom edges well. For the pelagics, 20–40 g metal slugs or surface poppers retrieved fast.
Over the deeper marks, switch to paternoster rigs with fresh squid, pilchards or fish strips, or work metal and bucktail jigs near the structure. Drift across the marks rather than anchoring on them — the bottom has localised high points that will take gear off you.
Best time: Winter and spring for snapper. Cooler months for the salmon run at the shallow end. Summer and autumn for kings and bonito. Dawn and dusk matter more here than on the gravel grounds, because the pelagic fishing is a real part of the mark.
Worth knowing: “Dumping Ground” as a name usually indicates a spoil or disposal site, which would mean dumped material creating structure on an otherwise plain bottom. We haven’t been able to confirm that for this position, and the charted reef bottom is consistent with natural ground. Either way it fishes as structure.
20. Pro Grounds — 23.3 km
33° 15.71′ S, 151° 48.56′ E · 23.3 km from the Heads · 18.2 km offshore · 30–50 m charted
The furthest offshore mark in this entire series. Eighteen kilometres of open water between you and the beach, and the name tells you who fishes it.
Structured reef bottom in 30–50 m, well out on the shelf where the East Australian Current has free rein. That current is the defining factor — it drives the upwelling that makes the ground productive, and on a hard-running day it also makes holding bottom the whole problem.
Target species: Snapper and various morwong and perch across the structured bottom. Yellowtail kingfish patrol the mid-depth reef and structural pinnacles, particularly when current or bait activity picks up. Mulloway hold near the structured ground and drop-offs.
Baits and rigs: Paternoster rigs with fresh squid, pilchards or strips of fish flesh. Metal and bucktail jigs or soft plastics worked near the bottom structure for the kings. Drift across the mark rather than anchoring — the localised high points here will strip gear from an anchored boat, and drifting covers more of the productive edges anyway.
Best time: Fishes year-round at this depth. Pick the day on current and forecast rather than season. This is a settled-weather mark and there is no quick run home from it.
21. Faulkins — 24.0 km
33° 17.22′ S, 151° 46.44′ E · 24.0 km from the Heads · 16.7 km offshore · nothing charts here
Faulkins is on the Marine Rescue list and local boats fish it, but nothing shows at this position on Navionics and we’re not going to invent a depth for it.
What can be said with confidence: it sits nearly 17 kilometres offshore, roughly 3 km south-west of Pro Grounds, in the same band of shelf. Depth figures circulating for it range from 50 m to over 90 m, which is a forty-metre spread and too vague to be useful — and species lists built on the deep end of that range should be treated with suspicion. Bar cod, for instance, are largely a 100 m-plus fish and are unlikely at the shallower end.
Sound it before you commit to a technique. If it comes up in the 50–60 m band, fish it like Pro Grounds. If it’s genuinely deeper, you’ll need the heavier gear.
Likely target species: On the evidence of the surrounding shelf grounds — snapper, pearl perch, teraglin, morwong and kingfish over the structure.
Baits and rigs: Heavy two-hook paternoster or ledger rigs, with enough lead to stay vertical in EAC current. Whole fresh squid, cut octopus or thick fillets of bonito that won’t get picked off on the way down. Heavy knife jigs or slow-pitch jigs for the kings.
Best time: Settled weather only. This is a long way out for a mark nobody can give you a reliable depth for, so treat the first trip as reconnaissance.
If you have good numbers or a sounded depth for Faulkins, we’d like them.
22. The Yarra Yarra wreck — 24.6 km
32° 54.29′ S, 151° 48.03′ E · 24.6 km from the Heads · 0.7 km offshore · 15–25 m charted
The best wreck on this coast, and the mark with the most history behind it.
Note the offshore figure. This is the longest steam in the article and it puts you 700 metres off the beach in Stockton Bight, just north of the Newcastle harbour mouth. Navionics charts it as “Yakka” — a live-bait mark — and that’s a fair description of how it fishes, though it undersells what’s down there.
The Yarra Yarra was an iron paddle steamer of 555 tons and 183 feet, built by W. Denny and Brothers at Dumbarton, Scotland, in 1851 for the Australasian Steam Navigation Company. She carried a two-cylinder Caird and Company side-lever engine of 200 horsepower and enough coal for seven days’ continuous steaming, with accommodation for fifty passengers in the saloon and thirty forward. She was a pioneer: she opened the first direct trade route between Victoria and Queensland, and she finished her working life, like so many others, as a collier.
On 15 July 1877 she left Newcastle for Sydney with 500 tonnes of coal in bad weather. She was soon forced to turn back, but the harbour entrance was a mass of breakers. Near the notorious Oyster Bank she appeared to lose steerage and turned broadside to the sea. A tremendous wave struck, carrying away the foremast. She heeled over and sank by the stern. All eighteen crew were lost.
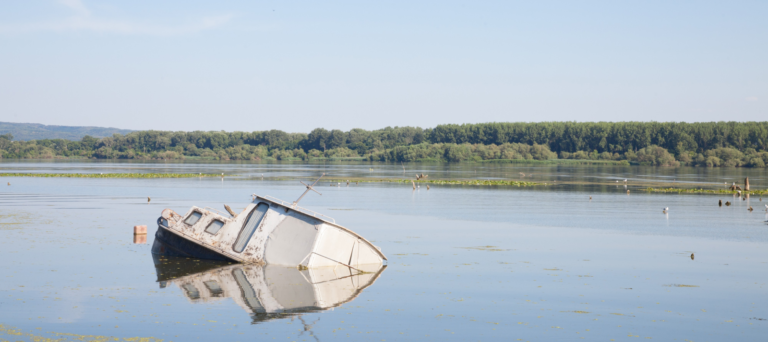
The wreck sits upright in about 15 metres and has been described as one of the most intact paddlewheel steamers in Australia. Both paddlewheels are visible, the port side intact apart from its timber paddles. The engine, the enormous boilers, the paddle mechanism, the windlass and chain can all be made out. Her engines are the earliest marine type yet located in New South Wales.
Target species: The wreck is a haven for fish life in a vast area of sand — that contrast is the whole point of it. Yellowtail scad in numbers, which is why it’s charted as a bait mark. Young mulloway are regular residents. Snapper and silver trevally over the structure. Countless blind sharks and a resident blue wrasse for anyone diving it.
Baits and rigs: Bait jigs for yakkas over the structure, then fish them live for the mulloway that are already there. For snapper, unweighted or lightly weighted baits drifted down a berley trail. Anchoring over an intact paddlewheel steamer is a good way to donate ground tackle — anchor up-current and berley back.
Best time: Best near high tide and after a dry spell. The Hunter River outflow affects this area badly and visibility drops away after rain, which matters for the fishing as much as for diving.
Respect it: eighteen men died here, with no survivors. The wreck is protected. Beyond the fishing, the loss has a place in the region’s history — it drove the reorganisation of lifeboat procedures at Newcastle and led to the founding of the Royal Shipwreck Relief Society of New South Wales, formed to support the families of those drowned at sea. Fish it and leave it as you found it.
Safety on this stretch
Log on and log off. Marine Rescue Lake Macquarie keeps a 24-hour radio watch from the base at Swansea Heads. Call on VHF 16 before you cross the bar and again when you’re back. These are the longest runs in the series and nobody comes looking if nobody knew you went.
These are long steams. Every mark here is over 20 km from the Heads. Fuel for the return leg is the calculation that matters, not the run out, and a northeasterly that builds through the afternoon turns the trip home into a slog.
Pro Grounds and Faulkins are genuine offshore marks. Sixteen to eighteen kilometres from land in 30–50 m of current-swept water. Settled forecast, capable boat, working radio and EPIRB. Faulkins in particular is a mark nobody can give you a confirmed depth for — treat the first visit as a look, not a session.
The Yarra Yarra sits near the Oyster Bank. That ground has a long and grim record, and it is exactly where the wreck you’re fishing was lost. Conditions at the harbour entrance can turn quickly in a swell. Give it respect.
Carry a release weight. At 30–50 m the deeper marks in this article will produce barotrauma in released fish. Without one, most of what you put back dies anyway.
Useful links
- Marine Rescue Lake Macquarie fishing matrix — the source list for these positions.
- Marine Rescue Lake Macquarie — log on and off. Radio base at Swansea Heads, 24 hours.
- Yarra Yarra maritime archaeological survey — the Heritage Branch inspection report, with build history and significance.
- Stockton Bight’s shipwrecks — background on the wrecks buried in the shifting sand.
Next in the series
Part 4 works the Norah Head grounds to the south — Paddy’s Reef, the Drop Off Ground, the Traps, Cunning Reef, Green Hills and the Shallows. After that, the Farm gets the standalone treatment it needs.
Positions sourced from the Marine Rescue Lake Macquarie fishing matrix and Navionics, and reproduced with the matrix’s own caveat: not for navigation. Distances recalculated from coordinates. Log on with Marine Rescue Lake Macquarie on VHF 16 before you cross the bar, and log off when you’re back.